Philodendron atom propagation – A step-by-step guide with relevant pictures
Last Sunday, my friend visited my house and saw my beautiful philodendron atom plant. Then she gave me the idea of propagating. Though it may look very complicated to you, it is very easy to propagate.
Among all the methods, the easiest method is the stem-cutting where you just need to cut a 5 to 6 inches stem having at least three leaves so that at least two leaf nodes can be grown on it. Then place it in a water pot and after rooting out, place it into a soil pot. Or, you can also place the cutting straight into a new suitable potting mix and then into a bigger pot after rooting out.
Atom plants will appear with unique small and green leaves that will make a special appearance in your house or garden. Now let’s discuss the process in more detail.
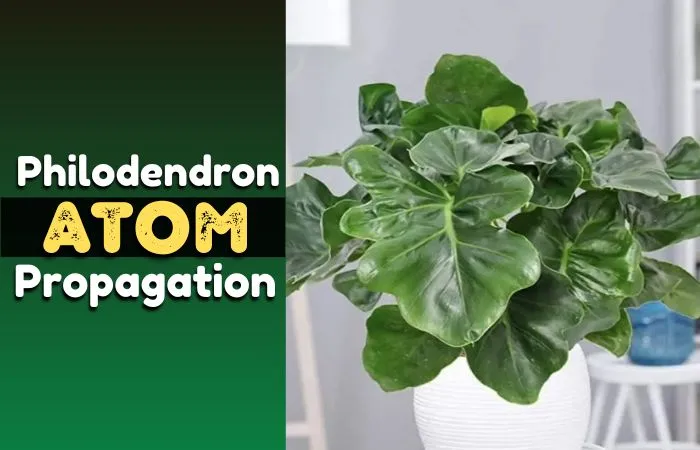
Plant Overview
The philodendron atom plant is consistently chosen as a houseplant because of its cute appearance. Take a quick view of some basic characteristics of it here.
| Topics | Description |
| Scientific name | Philodendron bipinnatifidum Atom, Philodendron selloum Atom. |
| Common name | Philodendron Atom, Lacy tree philodendron. |
| Family | Aracea. |
| Native | Subcontinent of South America, the subtropical rainforest area of Brazil and Paraguay. |
| Plant-type | Non-climber and compact. |
| Types of leaf | Big lobed, wavy or curly, glossy, and deep green. |
| Foliage types | are firm, wavy, and green in color. |
| Mature size | The average height is 7 to 11 inches and the width is 6 to 7 inches. But can be up to 1 to 2 feet tall in their maturity. |
| Time of growth | Spring |
| Toxicity | Toxic if ingested |
How do you know if your plant is ready to propagate?
Some indications make us understand about the preparation for propagation. Down below, take a look at some points to get assurance that the plant is ready to propagate.
1. Healthy Growth: The atom plant is a slow-growing and small size indoor plant of an average of 7 to 11 inches (20 to 30 cm) tall and 6 to 7 inches wide. When you find the plant on this size you can consider your plant for propagation.
2. Rootbound Condition: This plant has a natural tendency to get root bound. If the root of the plant is formed into a dense soil there will be little space for further growth. That means it is root bound. Then you can propagate it.
3. Maturity stage: If you can see the roots coming out of the water drainage holes of the pot, then it needs repotting. And at this stage, it can also be propagated.
4. Watering condition: You may find that the soil dries faster than before. So you need to water the plant more often than before which means your plant has become mature and can be considered for propagation.
Here are the steps from which we can know the proper time to propagate the plant as well as repotting.
Propagation tools you can start with
| Sharp cutting tools | A sharp scissors or a knife is a must and they have to be disinfected to avoid any type of diseases on new baby plant or any improper propagation. |
| Water pot | It is used in the water propagation method to root the cuttings into the water. |
| Mixing/soil pot | A mixing pot is needed in which the soil can be ready by mixing the suitable soil and fertilizer accordingly for soil propagation. |
| Watering can | A watering can is used to keep watering the plants after a particular time to avoid the soil from drying out completely. |
| Hanging rope | It is used to hang the plant if it is required for proper sunlight or if the homies want to decorate the house with the plants. |
How to propagate philodendron atom?
The philodendron atom plant can purify the air, so why do not we propagate this plant to fill the home with oxygen-rich air! There are a few ways to propagate these plants. I will discuss every method below and you can pick the one method you prefer most. Name of the methods-
- By stem cuttings in soil or water.
- By sowing seeds of the plant.
- By using air layering.
Propagation by stem cuttings in soil or water
Taking stem cutting and rooting in soil or water is one of the easiest ways to propagate the plant. There is a high chance of success with this method.
Step-1: Preparing the plant before collecting the stem: Water the philodendron atom plant to wet the soil a few days before cutting the stem. Watering ensures that the plant has time to absorb the nutrients and can be propagated.
Watering before cutting helps to strengthen the stem to tolerate the stress of being separated from the base plant.
Step-2: Make a clean cut off the stem: Make a clean cut off a healthy stem of 4 to 6 Inches long with a pair of sharp and disinfected shears or knife at one stroke. A blunt cutting tool can hamper the stem and the propagation system.
Make sure that the cutting must contain 2 to 3 sets of leaves so that the stem can have at least two nodes there. Besides, the stem length should not be too long. Otherwise, the roots will not grow correctly.
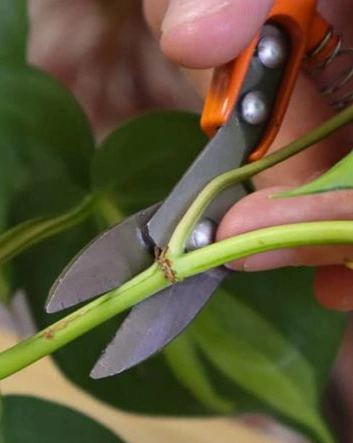
Step-3: Preparing the cut stem: If the cutting has many leaves, trim off the lower leaves near the node. But make sure that three or four leaves are there on the upper side of the stem.
Then you can also apply some rooting hormone like Indole 3 Butyric Acid (IBA) or Indole 3 Acetic Acid (IAA) as a naturally occurring hormone or 1-Naphthalene Acetic Acid (NAA) as a synthetic one. It encourages the growth of new roots though this is not a must. However, the rooting hormone always increases the chances of success while propagating a plant.
Step-4: Choosing the medium for the rooting system: 1. In case of water propagation, place the cut stems into the water in a water pot. Use a transparent glass container to keep checking on the rooting progress easily.
Ensure that no nodes are submerged in the water and the water should be changed twice in a week to provide fresh water. After 2 to 3 weeks the new roots will start growing.
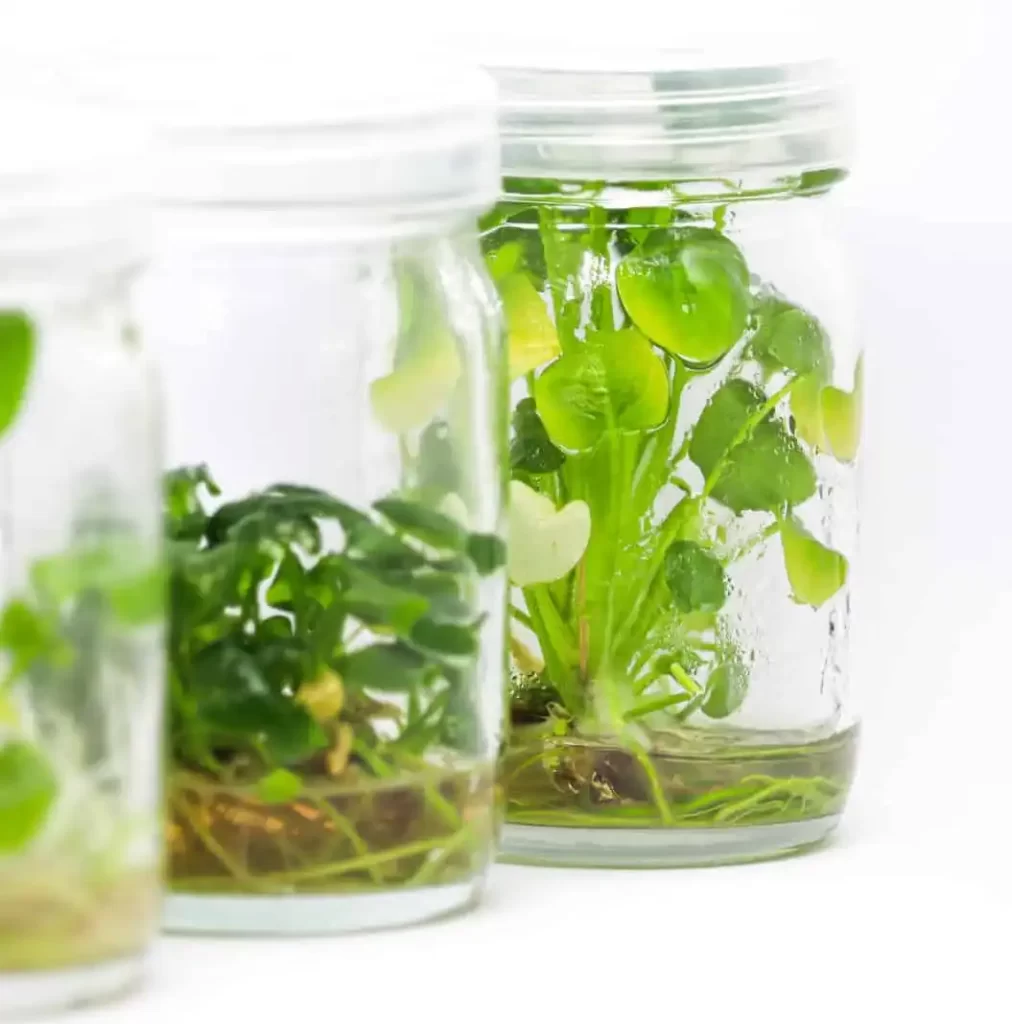
2. In the case of soil propagation, you can place the cut stem directly into the soil in a temporary and small soil pot. Make sure that the soil is rich with nutrients and moist but not soggy.
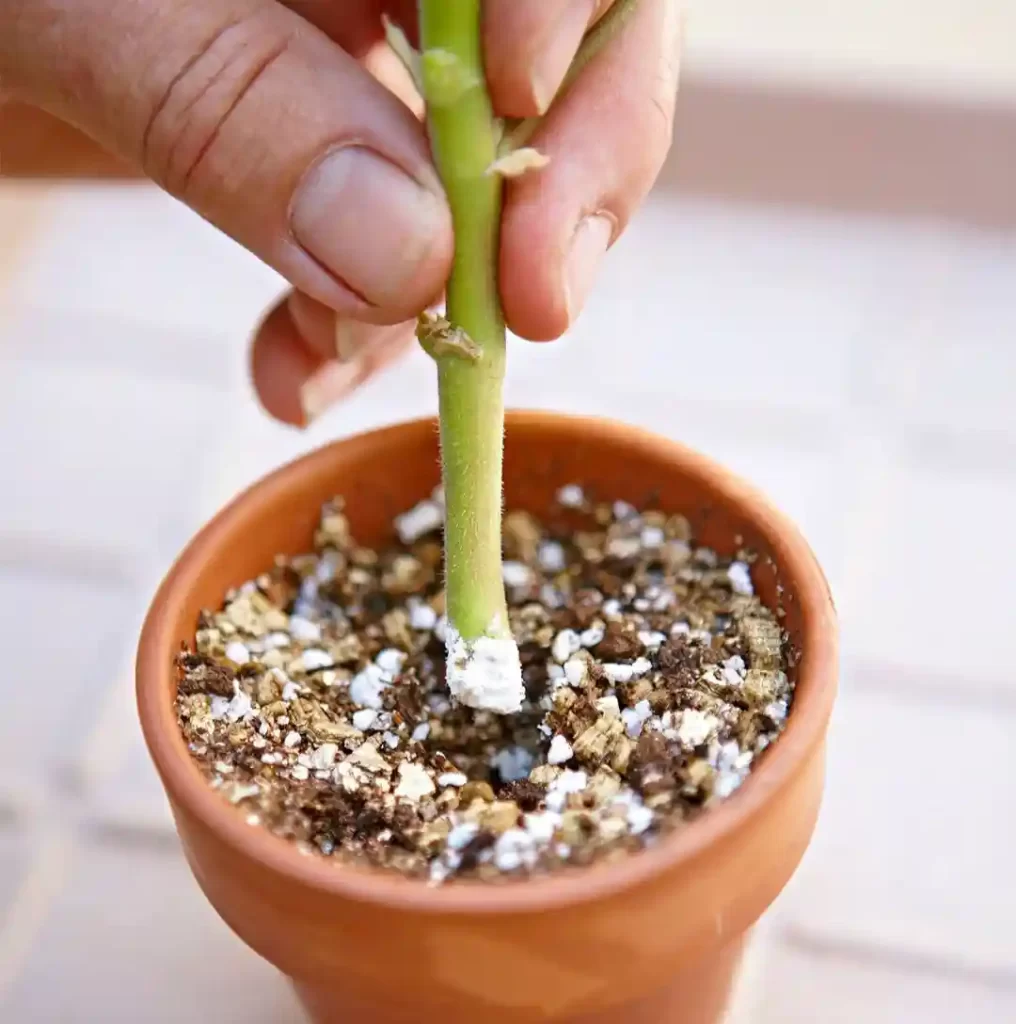
Sand, perlite, bark, etc. can also be added to help make the soil loose, airy, and well-draining. After 3 to 4 weeks, the roots will start growing from the cut stem.
Step-5: Covering the container With Plastic wrap: Cover the propagation container with plastic wrap or an old grocery bag or a plastic lid. It will trap moisture and humidity for the cutting and help in root growth.
You can make some holes in the plastic if required to provide fresh air through the plastic wrap. Then, place the container in a bright place with sufficient indirect sunlight.
Step-6: Preparing the permanent pot and the potting mix: The permanent pot should be about 2 to 3 inches bigger than before to give enough space for further better growth. More than 3 times bigger or 1 time smaller than its root ball with soil should be avoided as they can lead to underwatering or overwatering respectively.
The new pot should have a good drainage system and be filled loosely with moistened potting mix. The soil level should be about 2 to 3 inches lower from the top of the pot. Never compact the soil by pressing it down.
Step-7: Transferring the rooted cutting: After a good root growth in water or soil, the rooted stem is now ready to be transplanted into its permanent pot. Gently remove your rooted cutting from its container and place it on the soil.
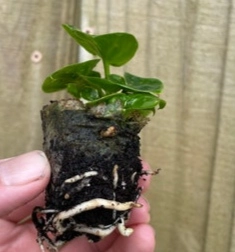
Place more potting medium around the root ball until the plant can stand independently. Be sure to put soil in the gaps of your root ball and gently press down. But don’t put much potting medium on the root ball.
Step-8: Providing a suitable environment: As philodendron atoms are subtropical plants, they prefer warmer temperatures. Around 21 °C to 24°C is best for growth.
Keep your atom plant in a bright place with indirect sunlight. Direct sunlight causes sunburn on the leaves and hinders root development.
Propagation by sowing seeds of the plant
Propagation of an atom plant from seeds is a little high maintenance process and takes much longer than stem cutting. However, it is an option if your mature plant has produced seeds for you.
In this method, you can place 2 to 3 seeds in each pot to have more chances of at least one sprout. Note that the seeds don’t need to be soaked before you sow them.
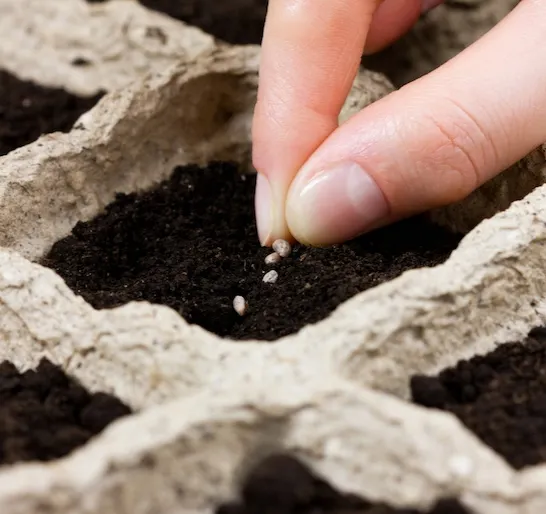
The pot should be with enough space to place each seed at least with ½ inch space around them and the seeds should be placed in the potting medium around ⅓ inch deep and covered with soil gently. Don’t compact the soil by pressing.
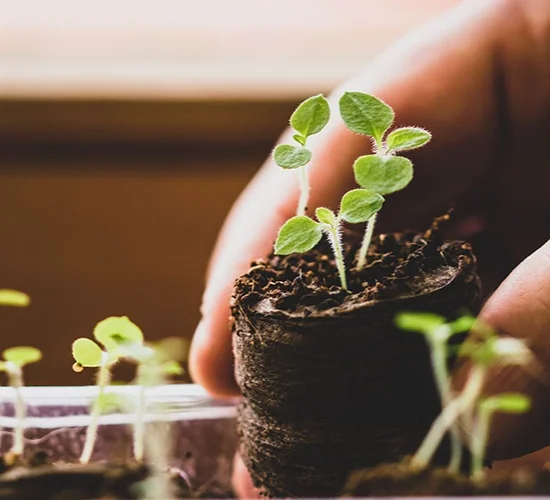
After providing optimum condition as before, your seeds will germinate in up to 8 weeks and gently remove the baby plant from its container and transfer it into a bigger pot with its appropriate potting mix and place the pot as before.
Propagation by using air layering
It is the least common method to propagate the philodendron atom. Still, this method can be used when you have little space in your room and do not want to use a separate pot to propagate cuttings, or do not have the time to germinate seeds.
Step-1: Preparation of cutting for air layering: Air layering is done by cutting the stem partially around 1.5 to 2 inches below a node and a thick toothpick is used to support the cut open with the mother plant.
Then, wrap a handful of moist sphagnum moss around the partial cut and ensure the moss is damp to help the new growth.
Step-2: Sealing of the wound part: After warping enough moss, seal the moss ball with any plastic wrap or foil paper. Use electrical or first-aid tape to seal the wrap ends.
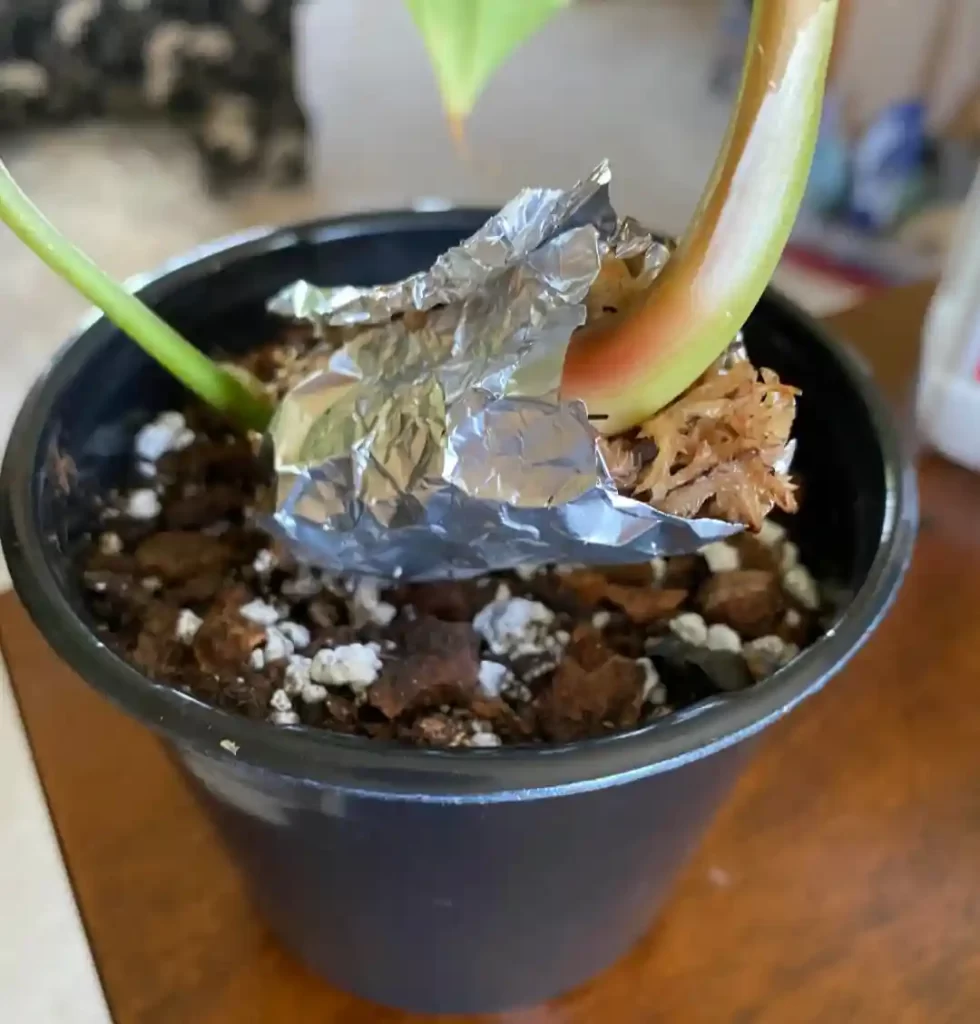
Place the plant in its suitable environment with bright indirect sunlight and sufficient water as before and wait for 3 to 4 weeks.
Step-3: Separation of the rooted layered cutting: After around three to four weeks, you can be able to see new root growth from the wounded cutting through the plastic wrap. Once the roots become visible, the layering is done and the layered cutting is ready to be separated from the mother plant.
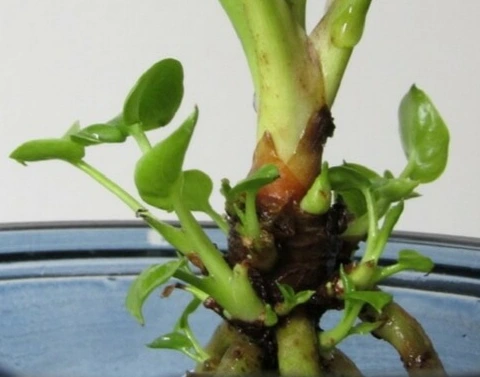
Then separate the layered plant by using any sharp and disinfected cutting tool below the layered area. A blunt and infected cutting tool causes a hamper to the plant.
Step-4: Place the layered baby plant into the potting mix: After separating the layered stem, remove the tape and the plastic wrap gently. Then place the layered stem with the moss ball in the potting mix.
Make sure that the moss ball is secured and that the layered stem gets an ample amount of bright indirect sunlight and sufficient water for better growth.
Which method is best to propagate the atom plant?
We know there are mainly three ways to propagate a philodendron atom plant. They are rooting from the cuttings in water or soil, planting seeds, and air layering and each method has its unique benefits.
Propagation by taking stem cuttings is usually the most common method for everyone as it is very simple and easy. It is a faster method than any other method.
However, growing the atom plant from seed can also be incredibly rewarding as by this method the chance of being successful is more. But it is a slow and time-consuming method.
Again, propagation by air layering is like a game changer as the cut part is partially attached to the mother plant which gives support and encourages the root growth. So, the chance of being successful is more.
So after studying all the benefits, give a thought to which method will be easy and best for you and your philodendron atom.
Why is the layering method different from the usual cutting method?
Layering is a different type of propagation method where stems are not separated from the main plant. They are still partially attached to the mother plant and the cut open is supported by using a thick toothpick or a thin bamboo stick.
Is the layering method useful to propagate the philodendron atom?
Yes, of course. Though the layering method is a little complicated and tricky, it is one of the most successful methods to propagate philodendron atom plants.
Generally, this method is considered more successful than propagating your plant through cuttings. Because the layered stem still gets the support of the mother plant while growing its new roots. The mother plant encourages the layered stem to grow better.
Precaution during propagation
Though the propagation of an atom plant is very simple and easy, some precautions must be taken.
- The cutting scissors or the knife should be sharp enough to cut the stem from the knife smoothly. Also, it should be disinfected so that the cutting stem should not get affected by any kind of bacteria.
- The cutting stem has to be at least 4 to 6 inches long with a minimum of 3 leaves on it.
- The leaves should be removed from the bottom of the stem and not from the top of the stem.
- The stem should be placed in the water in such a way that the exposed nodes will be under the water for rooting.
- The water used in the propagation should change at least once a week to give fresh water to the plant for healthy growth.
- We have to keep in mind that the soil used in the propagation should not dry out completely or be soggy. So we should check and water the plant accordingly.
Tips to take care of philodendron atom after propagation
Philodendron atom needs little ongoing care. Some special care should be taken to the newly potted atom plant for proper growth and maturity. They are given below.
- Location with sunlight: To grow, a philodendron atom requires bright and indirect sunlight. But, if you grow them outdoors, you have to keep them away from direct, and excess sunlight to prevent sunburn.
Again, indoors, the plant has to keep to the brightest area like the window.
- Types of soil: The rich organic, airy, and well-draining potting soil is ideal for this plant.
Always make sure that you use soil with good drainage as this will allow the soil to drain excess water quickly and prevent root rot after watering.
- Water: Philodendron atom plants are very acquisitive to water. So, watering is needed around 2 to 3 times a week or if 1/4th of the top of the potting mix is dry.
- Temperature: Philodendron atoms can tolerate warmer temperatures but 70°F to 80°F (21°C to 26°C) is best for growth. But keep in mind that extreme temperatures can hurt the plant. So, don’t place the plant close to any heater or air conditioner.
- Humidity: Atoms enjoy 50%-65% humidity. So, you can keep the environment humid enough by using humidity trays or placing your plant on a tray with pebbles and water.
- Fertilization: Use a balanced fertilizer every 2 to 4 weeks to provide the necessary nutrients if you are growing them in a loose potting mix. The philodendron atom plant prefers liquid fertilizers the most.
Besides, to grow in a nutrient-rich blend of soil, you can feed them once a month. Make sure that you dilute the fertilizer to half or quarter strength so that it does not burn the plant.
Again, for foliage growth and its deep-green color, we should use fertilizers that are high in nitrogen.
- Control pests: Sometimes few pests attack healthy plants and these are – spider mites, aphids, mealybugs, scale insects, etc.
To control these pests, we should use insecticides or neem oil, or a mild soap water solution by spraying them on the plants.
- Control common problems: Though a philodendron atom grows very easily, it may face some problems or diseases like yellow leaves, leaf spots, leaf drop, stem dieback, root rot, faded leaf color, etc. due to improper care and precautions.
To avoid these problems we have to take very special care and precautions for healthy plants.
Final thoughts
Gradually, I reached the end of my details. Finally, we can see that the philodendron atom is very easy to propagate. From the entire discussion, let’s recap what we get from this article.
- The philodendron atom propagation system is undoubtedly a simple process as you need not gather much equipment.
- Among all the methods, stem cutting is the best way to propagate the atom plant.
- You need to give a little attention to maintenance. But a pretty look will be provided in your room by their green glace.
Understanding all the points, you just need to take little care and precautions with the plant to avoid damage, choose the best one for yourselves, and have a delightful journey with a philodendron atom plant.
Wait!! Wait!! You are reaching at the end of the article. You can also read our step-by-step propagation guide on Philodendron cordatum propagation

